Step 1: Installing the Real-Time Ethernet Driver
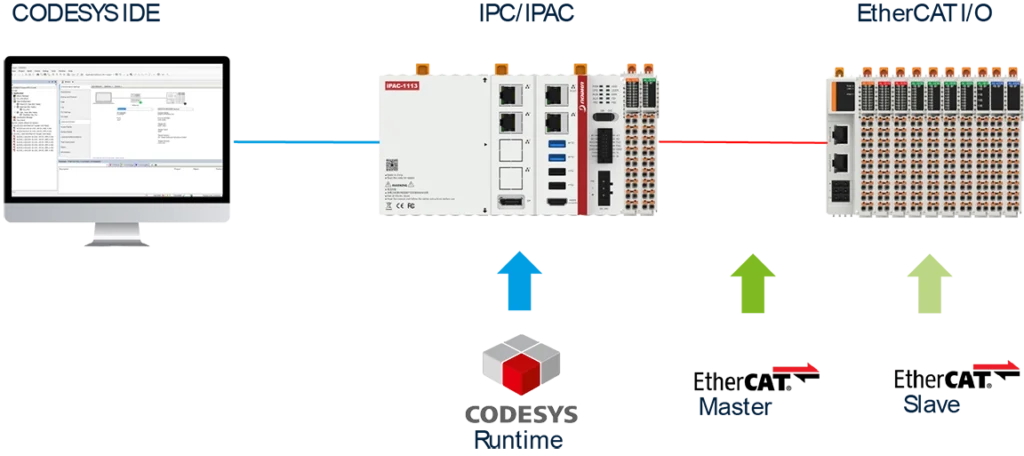
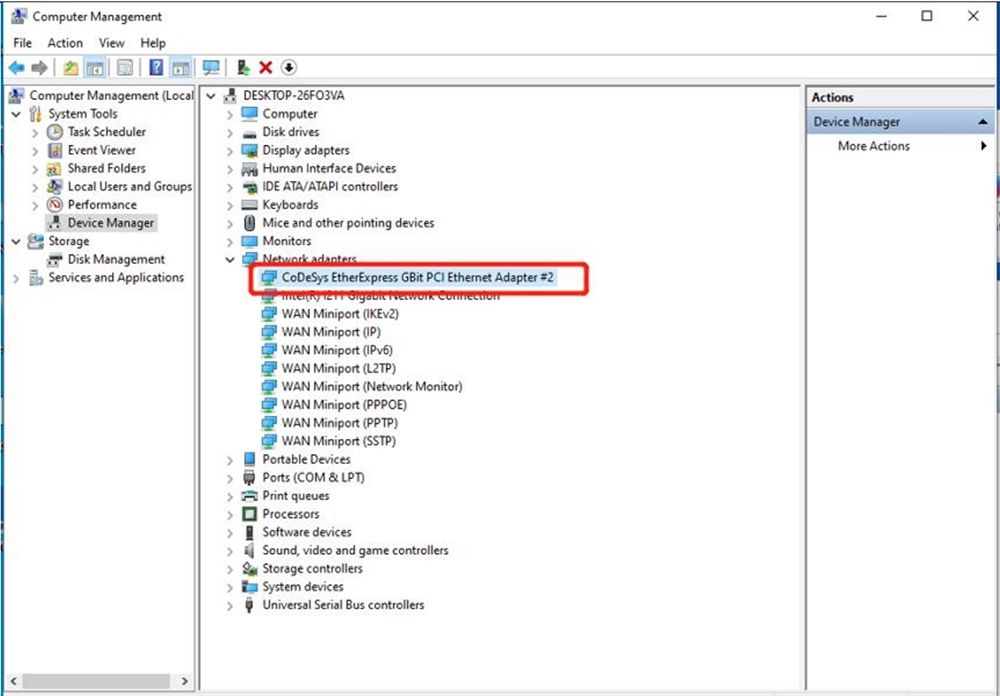
The first and most critical step is to enable your IPC to act as an EtherCAT Master. This is done by installing a CODESYS-specific real-time Ethernet driver. This driver allows the CODESYS Control runtime to bypass the standard operating system’s network stack and gain direct, reliable access to the network controller on the hardware. In the CODESYS IDE, you will select the physical network card on the IPC that you want to dedicate to the EtherCAT bus.
Step 2: Creating the Project
With the driver installed, you can now set up your CODESYS project.
-
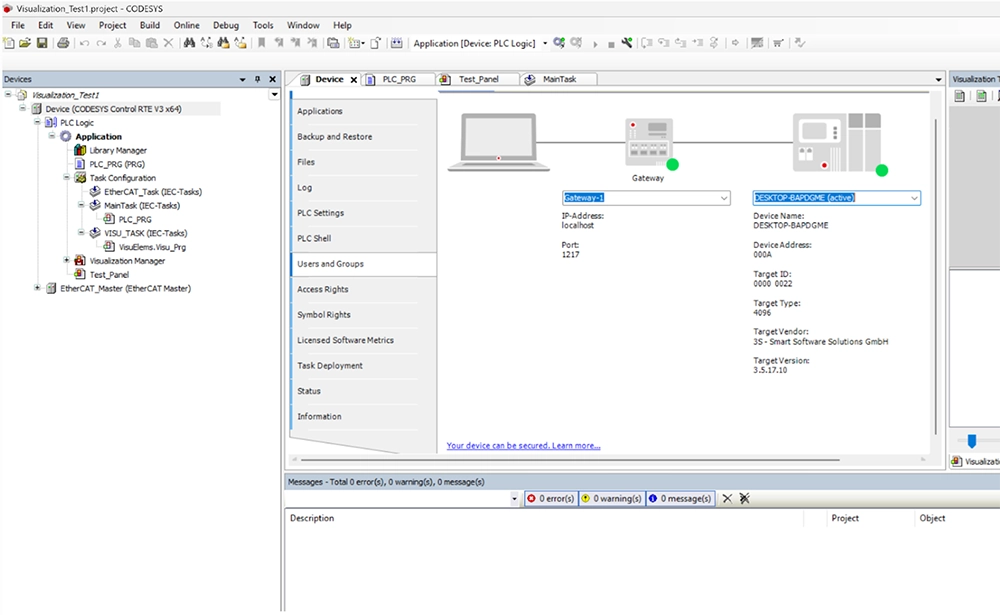
- Connect the CODESYS Development System on your host PC to the IPC via Ethernet.
- Create a new project in the CODESYS IDE.
- Configure the target device, selecting the Nodka iPAC as the controller.
Step 3: Importing Hardware Descriptions
Before you can add your hardware to the project, you must first provide CODESYS with the hardware’s “digital blueprint”. Nodka provides this in the form of .XML files.
-
- Import these .XML files into the CODESYS device repository.
- This gives CODESYS all the information it needs to correctly configure and communicate with the attached modules and drives.

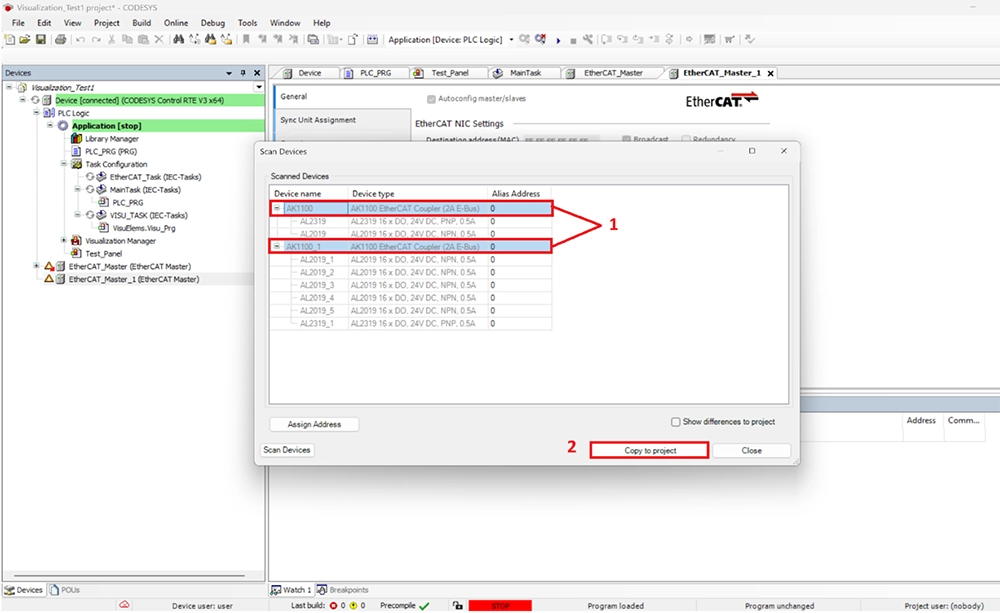
Step 4: Device Discovery
The flexibility of CODESYS and EtherCAT allows for automatic device discovery, which simplifies network configuration.
-
- Add the EtherCAT Master object to your project’s device tree.
- Use the “Scan for Devices” command. CODESYS will automatically detect all EtherCAT slaves connected on the network, such as your modular I/O and servo drives.
- The detected devices are added to your project’s device tree, creating a perfect digital representation of your physical hardware setup.
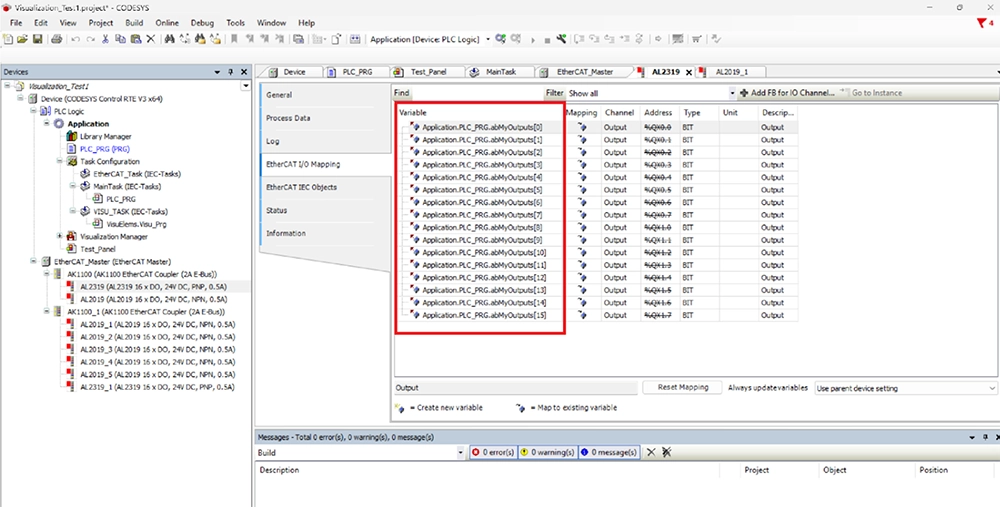
Step 5: I/O Mapping
With all devices discovered, you can now link the physical world to your program logic.
-
- In the I/O mapping table, assign program variables to the inputs and outputs of each module.
- This creates a direct connection between the state of your machine’s sensors and the variables in your CODESYS program.
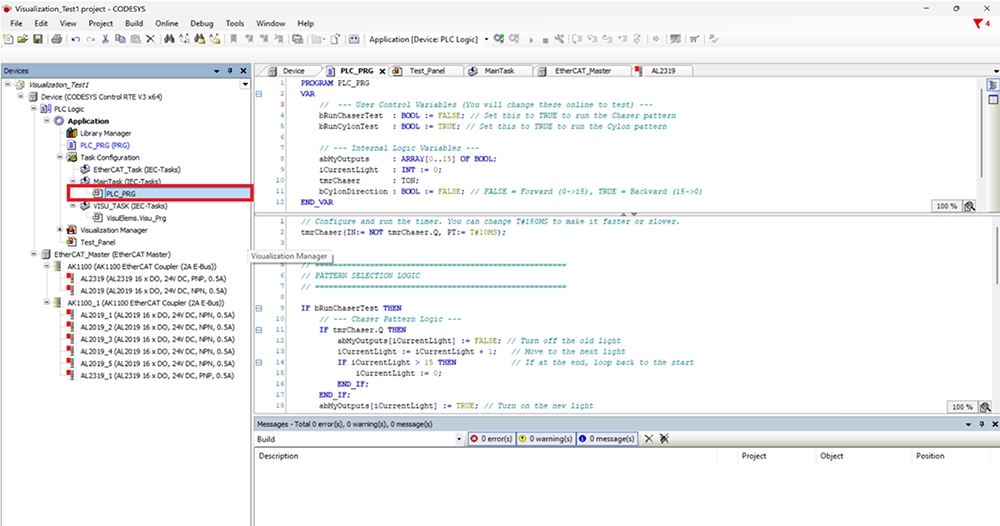
Step 6: Programming the Motion
The final step is to write the control logic and motion programs.
- Use the standardized IEC 61131-3 languages.
- For motion control, use the pre-built function blocks from the PLCopen Motion Control libraries. For example, MC_MoveAbsolute can be used to command a servo drive to move a robot to a specific position. The real-time optimizations of the Nodka iPAC ensure these commands are executed with high precision.
The Integrated Advantage
The power of this solution lies in the synergy between a purpose-built IPC and the CODESYS software ecosystem, which creates a powerful and open solution for next-generation automation. This integrated advantage offers significant benefits, including simplified deployment and reduced engineering effort. Ultimately, this approach provides a flexible, high-performance system for real-time control, which is essential for demanding industrial applications.
Ready to put this into practice?
This step-by-step guide is just the beginning. For deeper insights and additional examples, download our full CODESYS on iPAC IPC User Guide and review the CODESYS Tech Talk 2025 presentation for detailed walkthroughs and best practices. If you’d like to discuss your application or get support for deploying CODESYS on Nodka IPCs, reach out to our team at [email protected] .